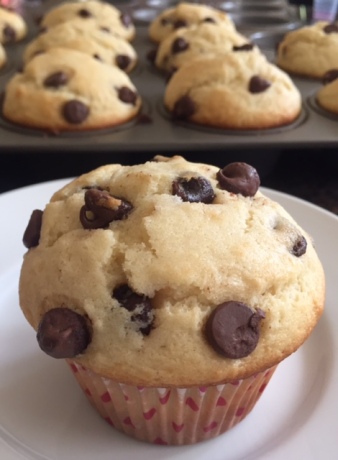
Bakery Style Chocolate Chip Muffins


three choc chip muffins

The infamous Lucy Jane woke up this morning and wanted chocolate chip muffins. As a mother who never lets her children down (oh how I wish that were true), I indulged. We actually made them together and it was fun to be in the kitchen with my daughter making breakfast (or dessert, depending on your perspective). We decided to double the recipe so that we could freeze a dozen and use them for snacks in their lunches for the upcoming week.


image

The secret to these moist, tasty muffins is the buttermilk! You can use whole or regular milk, but these babies texture and taste are best when the buttermilk is used. And since we all are chocolate lovers in this house, I don’t skimp and use the mini chocolate chips. But if you are not into eating dessert first thing in the morning, the mini chips may be a good idea for you. 🙂

FullSizeRender

Bakery Style Chocolate Chip Muffins

Preheat oven to 425 degrees

  • 2 1/2 cups all purpose flour
  • 1 Tablespoon baking powder
  • 1 teaspoon baking soda
  • 1/2 teaspoon salt
  • 1/2 cup butter, melted and cooled
  • 1 cup sugar
  • 2 large eggs
  • 1 cup buttermilk
  • 1 Tablespoon vanilla
  • half a bag of semi sweet chocolate chips

In a large bowl, whisk together flour, baking powder, baking soda, salt and chocolate chips. Set aside. In a medium bowl, mix together melted butter, sugar, eggs, buttermilk and vanilla. Mix the dry ingredients into the wet ingredients and gently fold together until combined. Scoop batter into a 12 cup muffin tin. Fill the cups close to the top. Bake the muffins at 425 for 5 minutes, then turn the heat down to 375 and bake for another 13-15 minutes.

Yields 1 dozen


Homemade Parmesan Breasticks

Sometimes you just need the goodness of a homemade breadstick. I felt that way last Sunday and wanted to make something to satisfy my craving. I used to believe that Sunday was a day of rest, but once I get baking and cooking, it becomes a day of food madness! But these babies were worth it! They don’t take long and they are easy to make. You can have hot, buttery, parmesan breadsticks in one hour!

Homemade Parmesan Breadsticks

  • 1 ½  cups warm water
  • 3 Tablespoons sugar
  • 1 Tablespoon active dry yeast
  • 3 ½ cup all purpose flour
  • 2 teaspoon salt

To Brush on top

  • 4 Tablespoons butter, melted
  • 1/2 cup parmesan cheese

In a small bowl mix the water, yeast and sugar together and let sit for 10 minutes.

In the bowl of your mixer add the flour and salt and mix. Pour the yeast water to the bowl and using the dough hook mix for a couple minutes until smooth. Let the dough rise for 15 minutes.

Roll out the dough on a floured surface into a large square. Brush the top with melted butter then sprinkle with the parmesan cheese. Fold the dough in half and cut into 15 to 20 strips.

Twist each strip and place on an ungreased cookie sheet. Let the twists sit for another 15 minutes to rise.

Preheat oven to 400 degrees.

Bake the breadsticks for 15 to 20 minutes or until golden brown. When they come out of the oven, brush the top with remaining butter.

Pumpkin Poppers

Oh, Pumpkin Poppers! You make the house smell like fall and you taste like a little bit of heaven in my mouth!

If you are a pumpkin bread lover, then this is a must try. We made these in the cooking class I teach to some young girls and not only were they a hit with the girls, I had several mom’s who said that they couldn’t keep out of them either. They have a deep, rich, spice, pumpkin flavor that will have your taste buds saying, “thank you!” This is also a great recipe if you have a few little helpers around. Who doesn’t love to roll these goodies in cinnamon and sugar?

PUMPKIN POPPERS

  • 2 1/2 cup all purpose flour
  • 4 teaspoon baking soda
  • 2 teaspoon baking powder
  • 1 teaspoon salt
  • 1 teaspoon cinnamon
  • 1 teaspoon nutmeg
  • 1 teaspoon allspice
  • 1/2 teaspoon ground cloves
  • 2/3 cup vegetable oil
  • 1 cup brown sugar
  • 2 eggs
  • 2 teaspoon vanilla
  • 1 1/2 cup pumpkin puree
  • 1 cup milk

Preheat oven to 350 degrees.

Combine flour, baking soda, baking powder, salt and all spices in a bowl. Whisk to combine.

In a separate bowl, mix oil, brown sugar, eggs, vanilla, pumpkin and milk. Pour flour mixture into wet mixture until combined.

Fill mini muffin tins almost full.  Bake for 10-12 minutes.

After poppers have cooled a few minutes, dip in melted butter and roll around in cinnamon sugar.

Melt

  • 1 cube butter  (may need additional cubes)

 Mix

  • 1 1/3 cup sugar
  • 4 Tablespoons cinnamon

 Yields about 3 dozen mini poppers.

Cheesy Garlic Bread

An oldie, but a goodie! I love ordering cheesy garlic bread when we go out, but it’s even better homemade! Yes, it’s bad for you, it’s a lot of carbs going in, but can’t a girl live a little?? I would not make this every night, but it sure is a great complement to any Italian meal. (Have you tried our homemade Alfredo sauce yet?) I love that it is a crispy, cheesy delight on the outside and soft and chewy on the inside. It is quick and easy to make and will dress up your meal!

Here they are right before going into the oven….yum!

CHEESY GARLIC BREAD

  • 1 loaf of French Bread
  • 1 stick butter, softened
  • 1 teaspoon garlic powder
  • 1 cup Shredded or Grated Parmesan Cheese (1/2 cup per side)
  • Shredded Mozzarella Cheese – no need to measure, enough to cover
  • 1 teaspoon dry Parsley flakes
  • Salt and Pepper to taste

Preheat oven to 400 degrees.

Soften the butter in the microwave then add 1 teaspoon of garlic powder. Mix together well. Cut your bread in half the long way and spread the butter and garlic mixture on top. Take the Parmesan cheese and sprinkle on top of both halves. Then cover with the mozzarella cheese. Sprinkle dry parsley flakes on top and salt and pepper to taste. Cook  for 13-15 minutes, or until edges are browned and cheese is melted. Remove from oven and slice bread horizontally for serving.

Homemade Soft Pretzels

For the month of June, I have been teaching kids how to cook. Sadly, it is the last week of cooking classes. These kids have been so fun and so curious! And really, such great cooks! I let the older kids decide what they wanted to make for the last week of class. One of the things they really wanted to learn was soft pretzels. I have only made these one other time and while they are pretty simple to make, they were not a regular in my household. So, I set out to find a good recipe for these students. Nailed it! Try these soft, chewy, touch of sweet, like you find in the mall pretzels!

SOFT PRETZELS

  • 1 cup milk
  • 1 package active dry yeast
  • 3 Tablespoons packed light brown sugar
  • 2 ¼ cups all-purpose flour
  • 5 Tablespoons butter (2 Tablespoons for dough and 3 Tablespoons for brushing on finished pretzels)
  • ½ teaspoon salt
  • 1/3 cup baking soda
  • 3 cups warm water
  • Coarse salt, to taste

Warm the milk in the microwave for about 40 seconds. Pour into a medium bowl and sprinkle in the yeast. Let the yeast soften, about 2 minutes. Then stir in the brown sugar and 1 cup of the flour with a wooden spoon. Melt 2 tablespoons of the butter and stir into the mix. Add the remaining 1 ¼ cups flour and salt to make a sticky dough. Add more flour if necessary (you’ll probably need a few tablespoons) to form dough into a ball. Turn dough out onto a lightly floured surface and knead, adding more flour if needed, until smooth but still slightly tacky, about 5 minutes. Shape into a ball, place in a clean, lightly greased bowl and cover with plastic wrap. Let rise in a warm spot until doubled in size, about 1 hour.

Preheat the oven to 450 degrees. Line a large baking sheet with parchment paper and spray with nonstick cooking spray. Punch the dough to deflate it, then turn out onto a lightly floured surface. Divide the dough into 6 equal pieces. Roll and stretch each piece with the palms of your hands into a 30-inch rope, holding the ends and slapping the middle of the rope on the counter as you stretch. Form each into a pretzel shape (form a U-shape, then holding the ends of the rope, cross them over each other and press firmly onto the bottom of the pretzel).

Dissolve the baking soda in 3 cups warm water in a shallow baking dish. Gently dip each pretzel in the soda solution, then arrange on a prepared baking sheet (re-shaping if necessary) and sprinkle lightly with course salt. Bake until golden, 10 – 12 minutes. Melt remaining 3 tablespoons butter and brush on baked pretzels.

 Yields 6 big pretzels

Cooking Kids Class, minus Zoe. Aren’t they cute?!?

Lemon Muffins

My house smells so good! Lemon muffins have to be one of my favorite things to take out of the oven and then to eat! I have tried and experimented with several lemon muffin recipes. Some are too tart, too sweet, to dry. This recipe puts all others to shame. The secret sauce “topping” gives it that extra tang that I think several lemon muffin recipes are lacking. If you are feeling saucy, add some blueberries or cranberries. I just prefer the plain old lemon today. Yum!

Lemon Muffins

  • 1 3/4 cups all-purpose flour
  •  3/4 cup sugar
  •  1 tablespoon lemon zest
  •   1 teaspoon baking powder
  •   1 teaspoon baking soda
  •   1/4 teaspoon salt
  •   1 egg
  •   1 cup lemon yogurt
  •   6 tablespoons butter or margarine, melted
  •    1 tablespoon lemon juice

Topping

  • 1/3 cup lemon juice
  • 1/4 cup sugar
  • 1 teaspoon lemon zest

Preheat oven to 400 degrees.

In a large bowl, combine the first six ingredients. In another bowl, using a wire whisk, beat the egg, yogurt, butter and lemon juice. Stir into dry ingredients until just moistened. Fill greased muffin cups two-thirds full. Bake for for 12-16 minutes or until a toothpick comes out clean. Cool for 5 minutes. Leave muffins in pan. Using a toothpick, poke 6 holes in each muffin. In a saucepan, combine the topping ingredients. Cook and stir over low heat until sugar is dissolved. Spoon over warm muffins.

Yields 12 muffins

Monkey Bread


If you like dessert for breakfast, then this is the dish for you! OK, it’s not exactly dessert, but the way my family inhales this you might think that it was! Buttery, cinnamony (is that a word?), gooey, pull apart, yumminess! Monkey Bread has been around for a while and this recipe is a semi-homemade, make the night before, easy recipe! Plus, it has all the gooey goodness that monkey bread is famous for. The secret is adding the butterscotch pudding packet. Yes, pudding! I had my doubts at first too, but once I tried it I knew it was a must! The recipe is semi-homemade because I use Rhodes Frozen Dinner Rolls. (I can’t always be a rock star momma!) But, when I have the time I use Shannon’s Famous Roll Recipe. Both are delicious, one just takes a wee less time.

Monkey Bread

  • 20 frozen Rhodes dinner rolls
  • 1/2  package cook & serve butterscotch pudding (NOT INSTANT)
  • 1/2 cup melted butter
  • 3/4 cup brown sugar
  • 1 tsp. cinnamon

Place the frozen dinner rolls in a greased bundt pan. Using only half the pudding packet, sprinkle over the rolls evenly. In a medium bowl combine melted butter, brown sugar, and cinnamon. Pour cinnamon mixture over the rolls. Place on counter uncovered overnight to rise. Get up before your kids and preheat oven to 350 degrees. Bake for 20-28 minutes, or until tops of rolls are a dark golden brown. Remove from oven. Place a large plate on top of the bundt pan and quickly flip so the bundt pan is now on top, upside down. Remove bundt pan and let monkey bread cool 5 minutes on plate before serving.

No Need to Knead Bread

I love when my house smells like bread. It makes me feel like I am doing something right. This bread is amazingly delicious and has that sweet of aroma of a bakers kitchen! And yes, it’s true, you don’t have to knead it. But let’s get down to the truth of the matter. This bread takes some serious planning to make. Is it worth it? I declare YES! Because there is no kneading there is almost no work. Just simply babysitting and prepping the dough. And then you get this beautiful, crusty, warm and soft inside, fluffy bread!

No Need to Knead Bread

  • 1 2/3 cups luke warm water
  • 3 cups all purpose flour, + some for dusting
  • 1/4 teaspoon instant yeast
  • 1 1/4 teaspoon salt
  • Cornmeal

In a large bowl combine flour, yeast and salt. Add 1 2/3 cups water, and stir until blended. Dough will be very sticky. Cover bowl with plastic wrap and let rest for 12-18 hours, in a warm room (about 70 degrees).

Dough is ready when the surface is dotted with small bubbles. Lightly flour a surface and place dough on it. Sprinkle with a little more flour and fold dough over on itself two times. Then cover dough loosely with plastic wrap and let rest 15 minutes.

Using enough flour to keep dough from sticking to work surface or to your fingers, gently and quickly shape the dough into a ball. Generously coat a cotton towel with flour and put the dough seam down on the towel. Then sprinkle cornmeal on the top of the dough and cover with another cotton towel and let rise for 2 hours. When it is ready, dough will be more than double in size and will not readily spring back when poked with a finger.

At least half an hour before dough is ready, heat the oven to 450 degrees. Put a 6 to 8 quart heavy covered pot (cast iron, enamel, Pyrex, or ceramic) in the oven as it heats. When dough is ready, carefully remove pot from the oven. SLide your hand under the cotton towel and turn the dough over into the pot. It may look messy, but this is ok. Shake the pan once or twice to even out and then the rest will take care of itself during the baking. Cover with lid and bake for 30 minutes. Then remove lid and bake an additional 12-18 minutes, or until loaf is browned. Cool on a rack.


Linking up at: Stuff and Nonsense

Shannon’s Famous Cinnamon Rolls

Alright people, I’m about to let you in on a huge secret!  These rolls are coveted in my community… people pay gazillions of dollars for these little honeys  (ok that’s an exaggeration, but I do sell a TON of them thru the holidays).  And, the truth is, they are easy.  Easy Peasy Lemon Squeezy!  All it takes is a bread machine, a little time, and roll pin.  See.. easy!  All you have to do is plop the ingredients into your bread machine and set it to the dough setting and let it do all the work for you!  Have more than one bread maker, as I do?  You can produce these en mass, as I have done in the picture above.  And truly, it takes the same amount of time to make 2 dozen or 10 dozen… just depends on how many bread machines you can get working for you.

I’ve also included the options to make the basic roll recipe into orange rolls, dinner rolls, cinnamon rolls, or an apple braid.  As you can tell, this recipe is super versatile.  You pretty much fashion them into whatever bread item you want to make.  I also use this recipe to make buttery white bread, cinnamon pull aparts, cinnamon raisin bread, monkey bread… the options are endless.  So, here’s just a few to get you started.

Make these throughout the holiday season and you will become the star of each and every dinner party, Christmas breakfast, Thanksgiving celebration, or family event!  Seriously, and you’re welcome!

Shannon’s Best Ever Rolls

Basic Roll Recipe

  • 1 2/3 cups Water
  • 2 Tablespoons Butter
  • 4 2/3 cups Flour
  • 2/3 cup Sugar
  • 2 teaspoon salt
  • 1 rounded Tablespoon yeast

In the chamber of a bread maker add all ingredients except the yeast.  Stir around to blend sugar into mixture.  Add yeast.

Set bread maker to “dough” setting… wait for cycle to finish (should take about an hour and a half)

When cycle is complete, turn out dough onto a board sprayed with non-stick cooking spray, and shape to desired type of roll.

Cinnamon Rolls

Cinnamon mixture:

  • 1 cup sugar
  • 1 cup brown sugar
  • ¼ cup cinnamon
  • ½ cup flour

Mix the above ingredients in a bowl

In a separate bowl melt 1 stick butter

Divide dough into 2 even sections.  Roll out one section(using Pam) into a rectangle.  Brush with butter.  Sprinkle with ¼ cup cinnamon mixture.  Roll up and cut into rolls.  (Should make about 9 pieces)  Repeat with second section of dough (So entire batch makes 18 rolls)

*At this point dough can be frozen or baked.  See baking instructions.

Dinner Rolls

Divide dough into 3 equals parts.  Roll into circles and cut into 8 crescent shaped pieces.  Roll into crescents.  *At this point dough can be frozen or baked.  See baking instructions.

Orange rolls

Follow basic roll recipe, except add the zest of one orange to the dough ingredients.

Then divide dough into 2 equal parts.  Roll into rectangles, and cut into 12 strips, vertically. Tie strips into knots, tucking ends under to form rosettes.  *At this point dough can be frozen or baked.  See baking instructions.

Apple Braid

Divide the dough into 2 equal parts.  Roll each part into a rectangle, keeping the middle section of the rectangle at double the thickness of the side sections.  Brush middle with butter, and sprinkle with ¼ cup cinnamon mixture.  Then top with sliced, peeled apples.  Cut the sides diagonally and fold over each other in a braid.  See illustration.  * At this point dough can be frozen or baked.  See baking instructions.

Glaze for Cinnamon rolls and Apple Braid

1 stick butter, melted

8 cups powdered sugar

2 teaspoons vanilla

milk to desired consistency

Glaze for Orange Rolls

1 stick butter, melted

8 cups powdered sugar

orange juice to desired consistency

* both of these glazes can be poured into plastic bags (in 1 cup portions)and frozen with the rolls, then left on the counter to defrost while the rolls are baking.  Then just snip a corner off the plastic bag and pipe onto rolls.

Baking Instructions for Rolls:

Place rolls onto a jelly roll pan that has been sprayed with non-stick cooking spray.  Allow rolls to rise for a couple of hours or longer, covered by a dish towel until the desired volume is achieved.

Bake at 375 degrees for 12-15 minutes, or until tops are lightly browned.

If you have chosen to premake the rolls and freeze them, there are 2 baking methods:

Quick Method

  • Remove rolls from freezer & place in a 9×13 pan that has been sprayed with a non-stick spray (Pam.)
  • Leave on counter to rise for 1 hour.
  • Leave bag of glaze on the counter to thaw.
  • After an hour, place the rolls in a 200 degree oven for 20 minutes.
  • Remove rolls from oven and reset temperature to 375 degrees.
  • When oven reaches 375, put rolls back in and bake for

12 minutes for dinner rolls or orange rolls

15-18 minutes for cinnamon rolls or apple  braid,

until tops are golden brown.

  • For rolls with glaze (orange, cinnamon, apple braid.  Snip the bottom corner off the glaze bag, and pipe glaze onto warm rolls

 Overnight Method (this is what I prefer):

  • Remove rolls from freezer & place in a 9×13 pan that has been sprayed with a non-stick spray (Pam.)
  • Leave on counter to rise overnight.
  • Leave bag of glaze on the counter to thaw.
  • Bake rolls at  375 degrees for

12 minutes for dinner rolls or orange rolls

15-18 minutes for cinnamon rolls or apple braid,

until tops are golden brown.

  • For rolls with glaze (orange, cinnamon, apple braid.  Snip the bottom corner off the glaze bag, and pipe glaze onto warm rolls.

Linking up at: Stuff and Nonsense, Simply Sweet Home, Happy Hour Projects, Jane Deere, The Shabby Creek Cottage, Somewhat Simple, Blue Cricket Design, Serenity You, Skip to My Lou, The DIY Home Sweet Home Project, Add a Pinch, The Girl Creative, Singing Three Little Birds, Sumo’s Sweet Stuff, C.R.A.F.T., My Sweet and Savory, Chef In Training, Tatertots and Jello, Coastal Charm, Tip Junkie, Sugarbee Crafts, It’s A Blog Party, The Blackberry Vine, Reasons to Skip the Housework, Strictly Homemade, Nap Time Creations, Crazy For Crust, At the Well, This Chick Cooks, Sew Much Ado, Somewhat Simple, Someday Crafts, Miz Helen’s Country Cottage, Everyday Tastes, Passionately Artistic
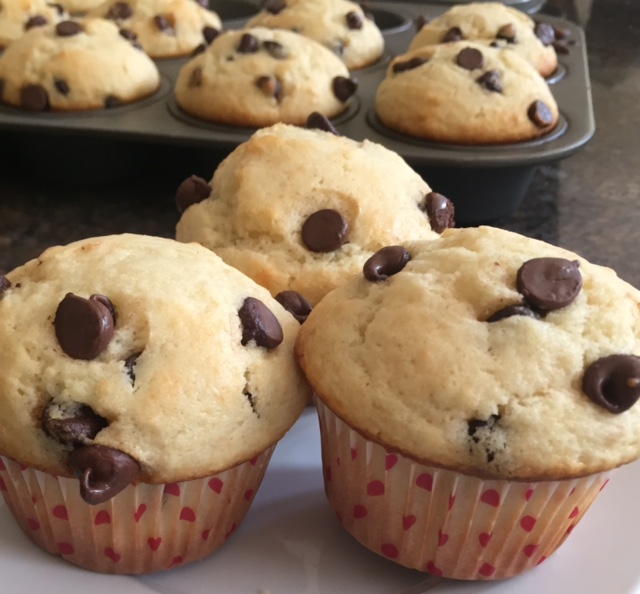
Blueberry Muffins

Do you ever go to the grocery store looking purely disgusting and then you run into someone you know, and they, of course look fabulous? You are embarrassed and trying to end the conversation quickly. You want out of the store before the person notices that your hair really hasn’t been washed for 4 days instead of the 2 you sheepishly admitted to. I went to the store the other night to get blueberries and I am happy to report that I was the one looking fabulous! That’s right, we had just had our family pictures taken and I was dressed for the occasion, makeup on, hair done, and I didn’t see a soul I knew! Isn’t that the way it always works? I had been craving these muffins for a while now and knew that I needed to make them this weekend. They were our Sunday morning breakfast. The hubs had 3! They are moist, tasty, and the streusel on top makes them seem so fancy! Oh, because they are! We all need a go-to delicious blueberry muffin recipe, right? Here ya go…you’re welcome!

Blueberry Muffins

  • 1 1/2 cup flour
  • 1 1/2 teaspoon baking powder
  • 3/4 teaspoon salt
  • 1/2 cup sugar
  • 2 teaspoon lemon zest
  • 1 egg
  • 3/4 cup buttermilk
  • 1/3 cup canola oil
  • 1 teaspoon vanilla
  • 1 1/2 cup fresh blueberries

Streusel:

  • 1/2 cup sugar
  • 1/3 cup flour
  • 1/4 cup butter, cubed
  • 1 1/2 teaspoon cinnamon

Preheat oven to 400 degrees.

In a large mixing bowl combine flour, baking powder, salt, sugar and lemon zest. Make a well in the center. In a small mixing bowl whisk together egg, buttermilk, oil and vanilla. Pour in the middle of the well in the flour mixture. Stir until just combined. Gently fold in blueberries to batter. Either spray your muffin tin with vegetable spray or use cupcake liners and fill muffin tins 2/3 full.

For the streusel: Combine sugar, flour, and cinnamon. Then cut in butter with a pastry cutter or fork. Mixture should be crumbly. Sprinkle over the batter on top of each muffin tin. Bake for 18 minutes, or until a toothpick inserted into muffin, comes out clean. (Makes 12 muffins)

Linking up at: Skip to My Lou, Sew Chatty, C.R.A.F.T., I Heart Naptime, The Tablescaper, Everyday Mom’s Meals, Stuff and Nonsense, The Girl Creative, Add a Pinch, Two Maids a Milking, Reasons to Skip the Housework, Blessed With Grace, Mandy’s Recipe Box, Chef In Training, Sugar Bee Crafts, The Blackberry Vine, It’s a Blog Party, Strictly Homemade, Nap Time Creations, Sew Can Do, This Chick Cooks, Sew Much Ado, Lady Behind the Curtain, Miz Helen’s Country Cottage, Somewhat Simple, The Shabby Creek Cottage, Everyday Tastes, Feeding Four, Stuff and Nonsense, Blue Cricket Design, Simply Sweet Home, Jane Deere